waldo kent
Registered user
Registered: 08-2010
Posts: 178
Karma: 1 (+2/-1)
|
|
Reply | Quote
|
|
Waldo's Build
CALVES
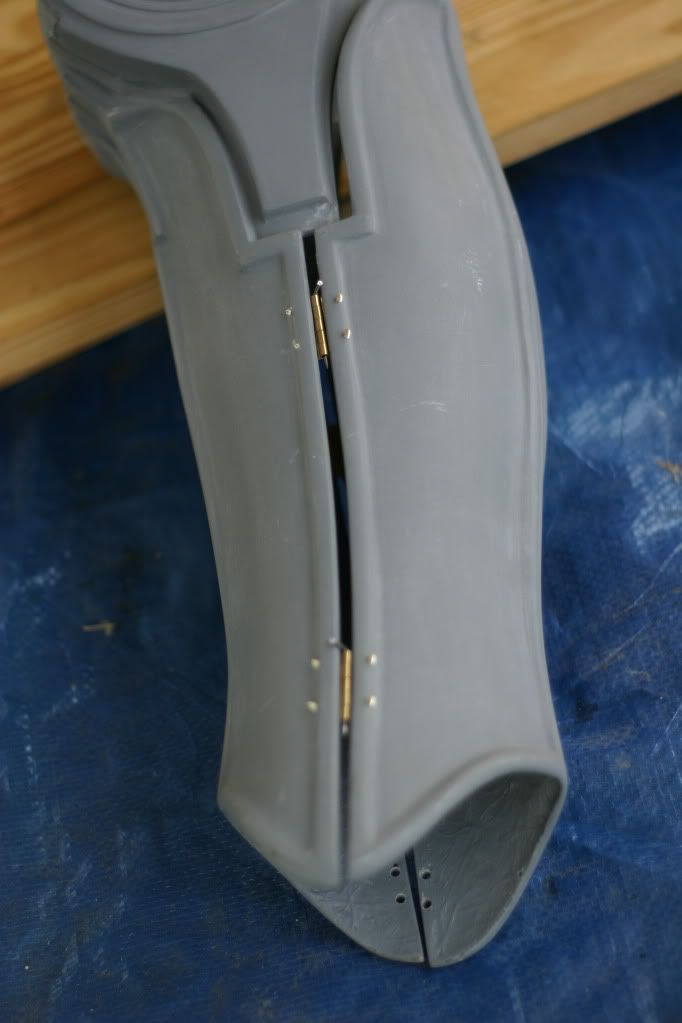
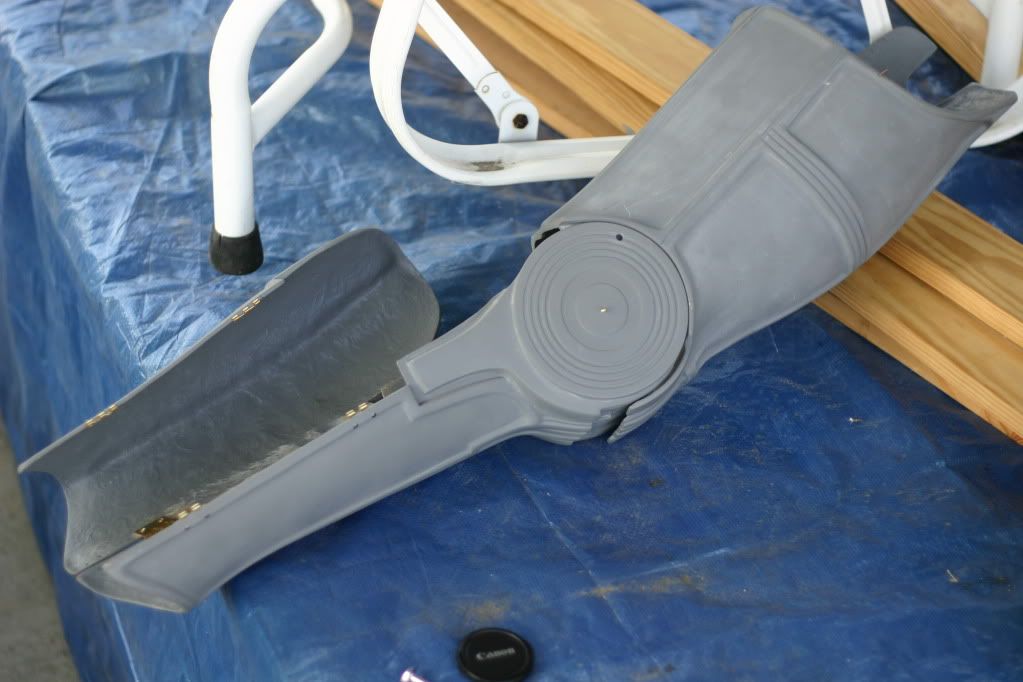
Let's start with the TK409 Calves. Each one comes in 2 sections. They will be hinged together to allow you to put them on and lock them in place with L shaped pins you will make. The calves are then connected to the thighs using bungee cords.
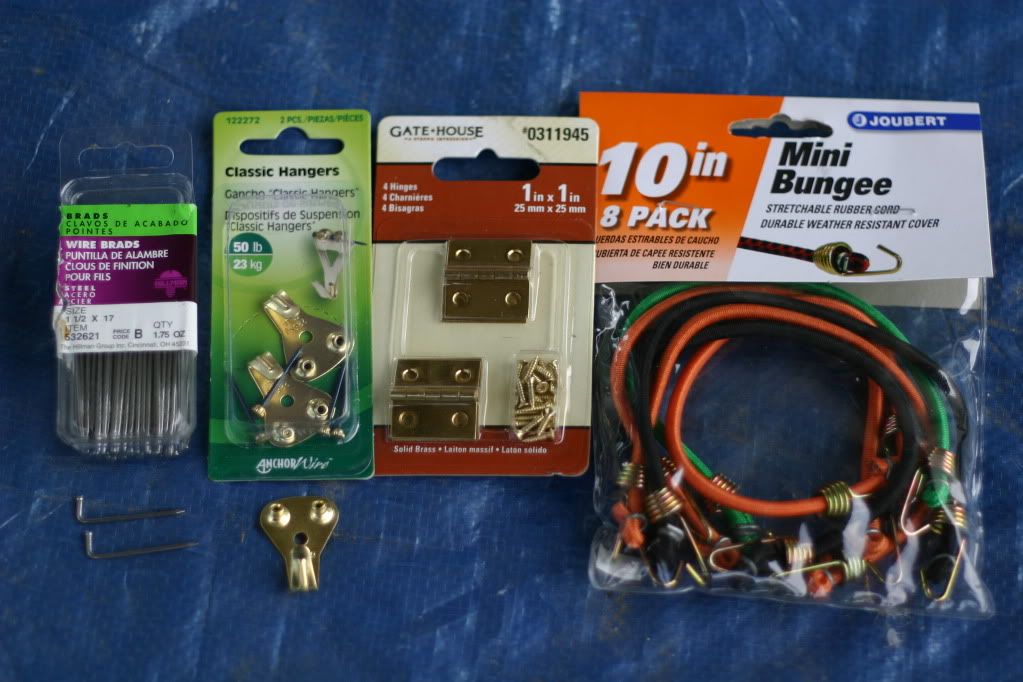
You'll need a pack of 1 1/2" finishing nails, 6 picture hangers, 8 1"x1" brass hinges (I bought an extra pack for the screws in case the heads strip out) 4 10" bungee cords. I bought these at LOWES.
NOTE: I purchased some of my C3PO parts secondhand so you may see unusual holes drilled in some of the parts. Do not drill these hole they are wrong. I will fill them in later.
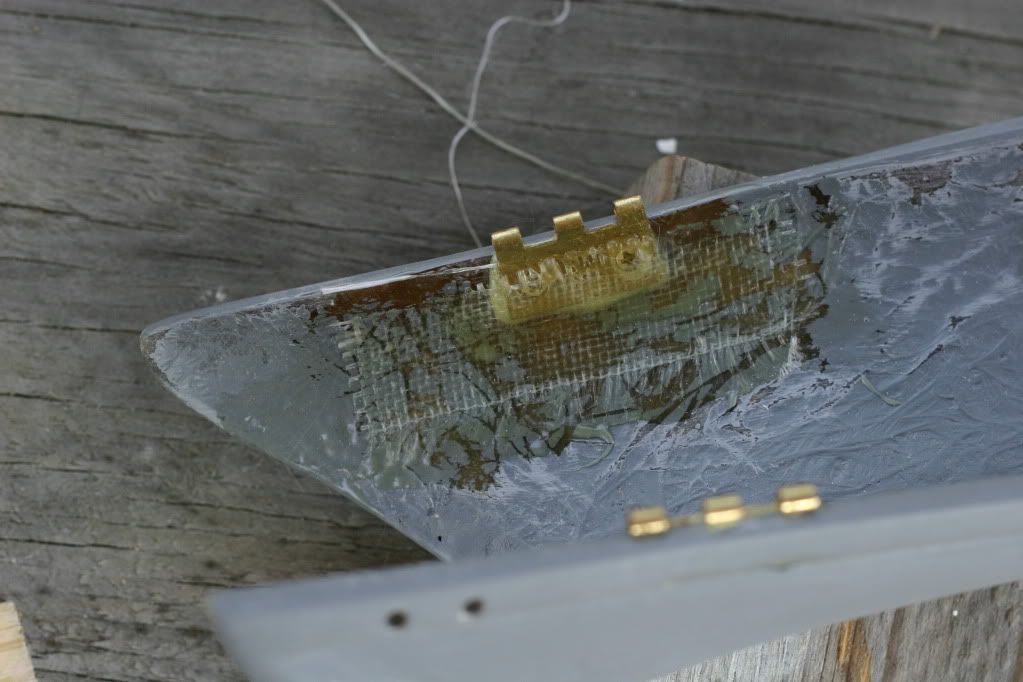
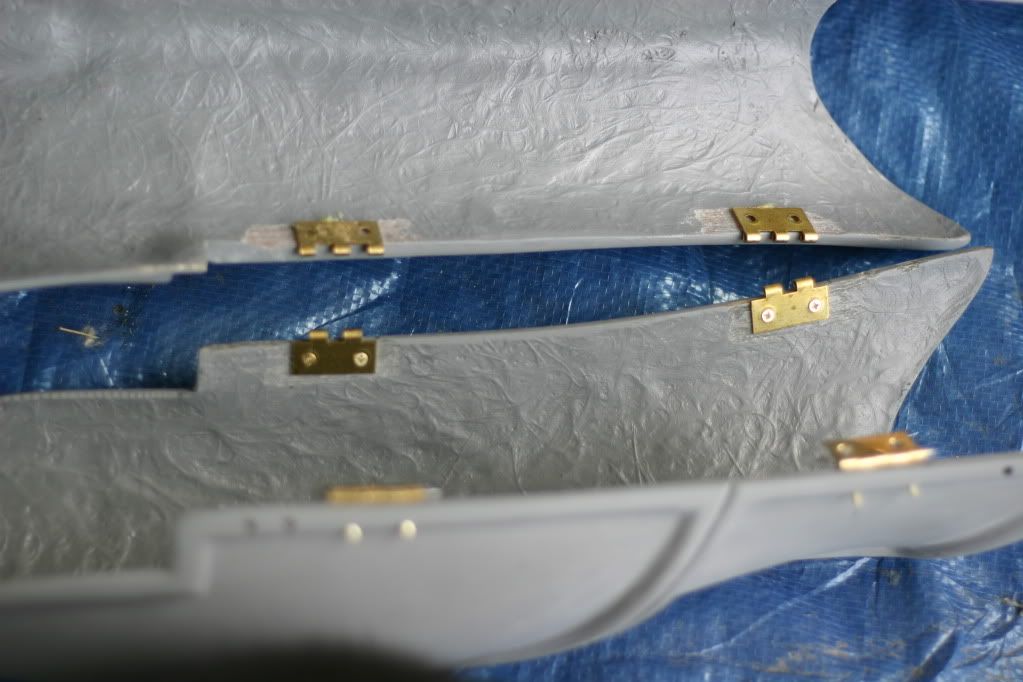
To see about where the hinges are placed, here is a finished calve. Note the L shaped pins holding the hinges together. The lower hinges should be placed high enough so that they do not impede the ankle (sock) of the shoe. It comes up inside the calve several inches. Test fit it first.
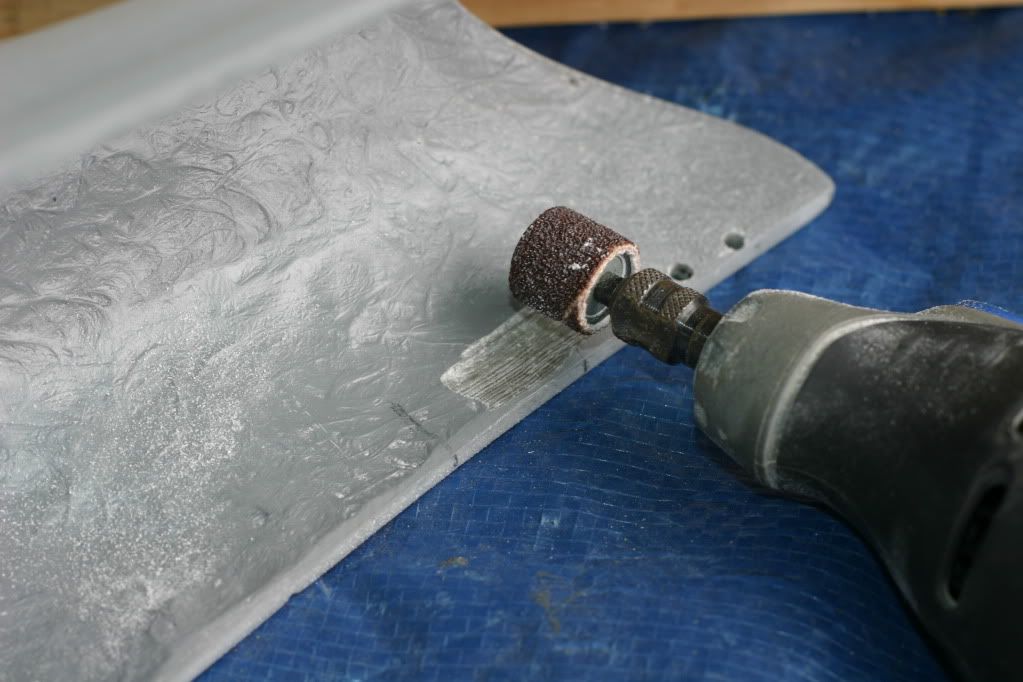
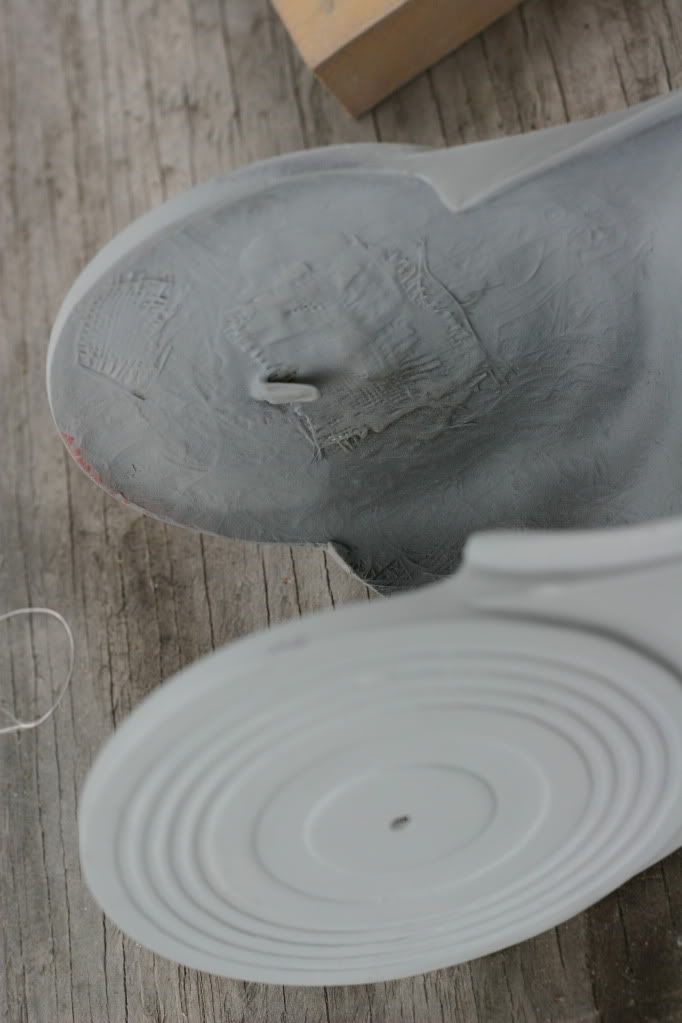
Starting with the rear calf half, make a pencil mark for your hinge placement. Mark the edge. Insure the hinges lay flat on the inside surface. I used a Dremel to smooth out the fiberglass bumps. You don't want your hinges to wobble. Take care not to remove too much. One thing I learned later was it might be a good idea to sand around that groove you just made because you may want to lay some fiberglass over the hinges to reinforce them.
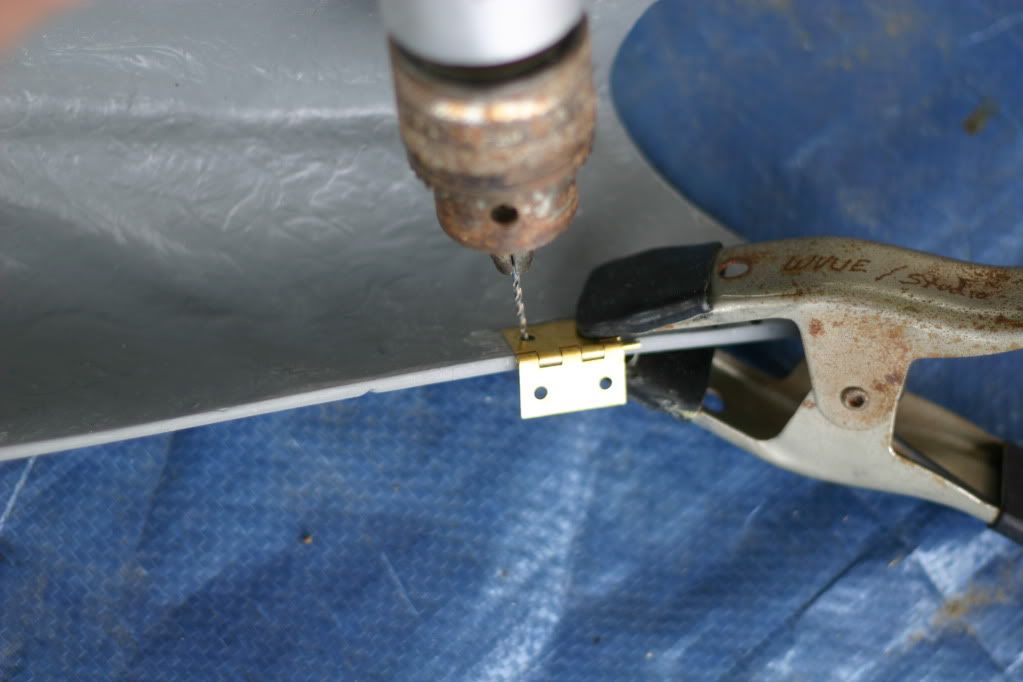
Remove the pins from the hinges by using a nail and a hammer. Bend the top of the finishing nail into an L shape and insert into the hinges. Place the first hinge on the pencil mark and clamp in place. Drill pilot hole all the way through and insert screw. The screws will be too long but we will fix that later. repeat this with the remaining 3 hinges.
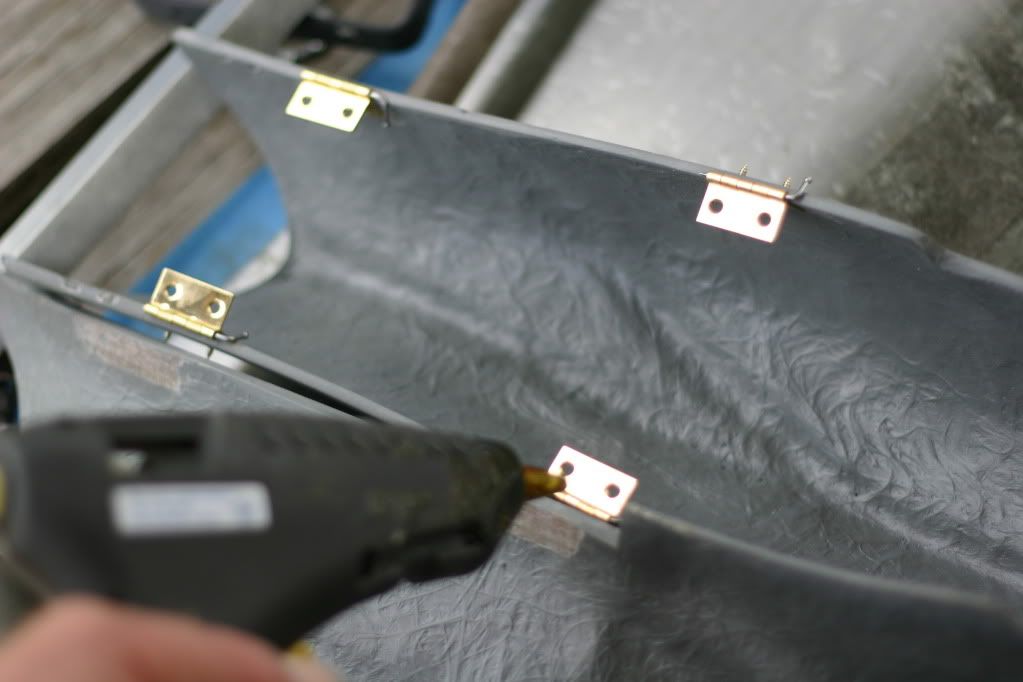
Test fit the front shin to the back calf and make sure you know how it will line up. on one side of the add a small amount of hot glue on the 2 hinges and quickly fit the hinges to the front shin. Once cool, remove the L pins and screw the hinges in place.
As you can see in the picture the hot glue simply holds the hinge in place so that you can screw it. Once you have completed one side, place the L pins back in the hinges and match up the other side. Hot glue the inges inplace, remove the pins and screw in place.
Connect the thigh and the shins.
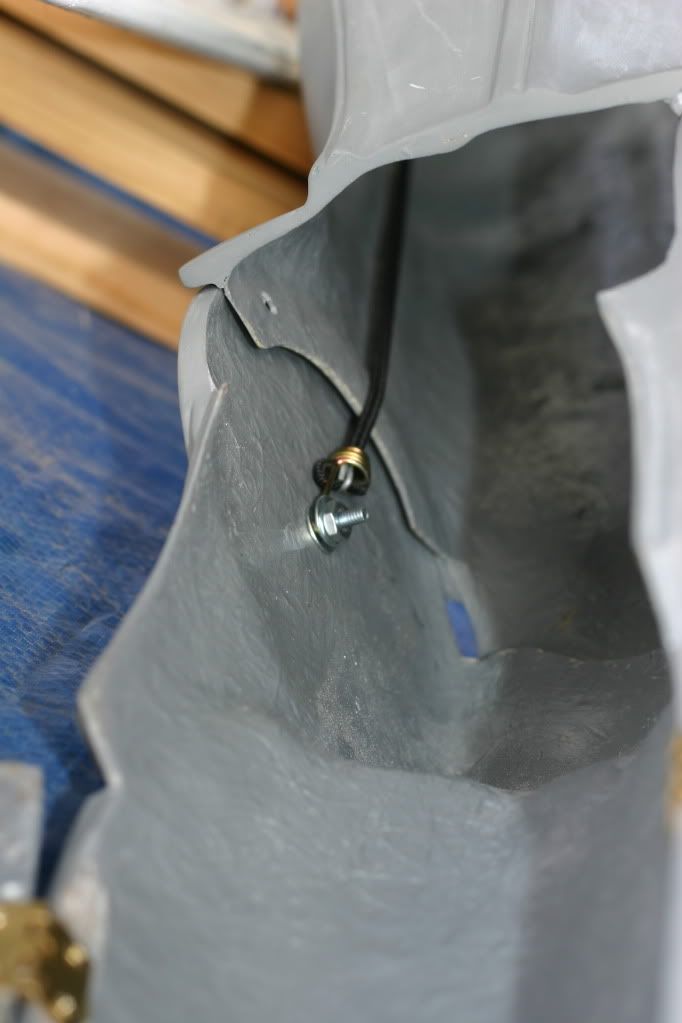
Attach one hook end on the bungee cord to the nut and bolt of the Knee Piston. For now hook the other end on the top edge of the thigh. we will place picture hangers near the top after we make sure they will fit with the shorts.
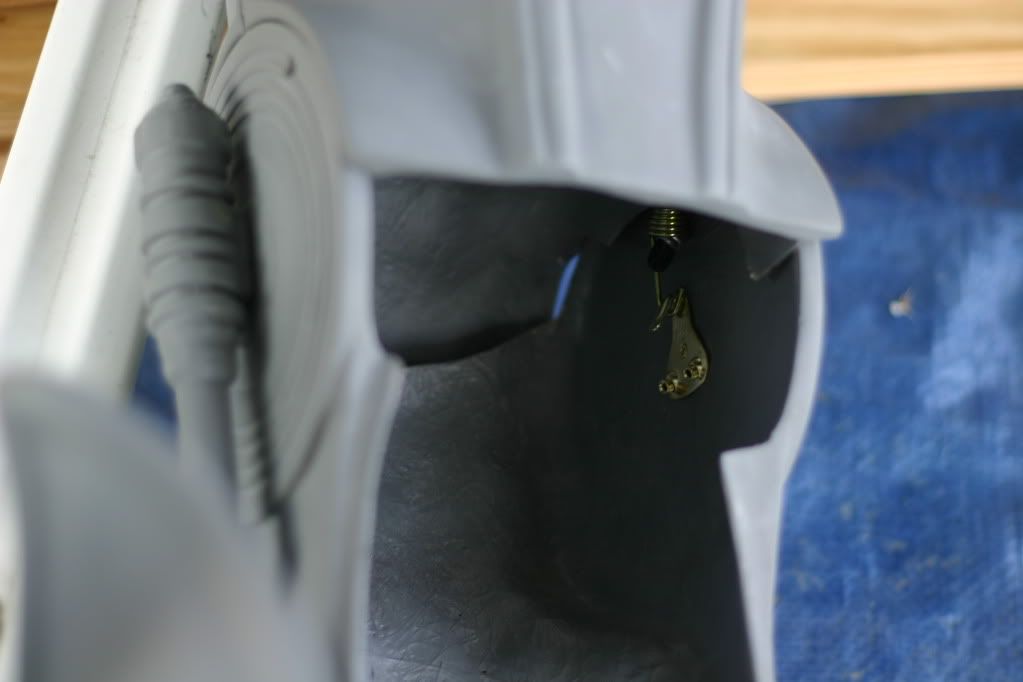
Using an extra screw from your hinges, drill a pilot hole in the center of the knee disk and attach a picture frame hook. UPDATE: I felt later that the fiberglass here was too thin for a screw. I chose not to use a screw to attach the hook but you can use hot glue temporarily. I then fiberglassed it in place.
UPDATED PHOTO OF PICTURE HOOK
Attach the other bungee to the hook and other end to the top of the thigh. Now go try it on but get someone to help you. Once you are satisfied, MARK EACH SCREW at the surface, REMOVE ONE HINGE SCREW, CUT IT DOWN, REPLACE, and repeat for each screw including the knee disk. I would advise you not to cut or grind the screws while in place. it may damage the surface. You may find you will only be left with 3 or 4 threads per screw. We will fill the holes later. I will also fiberglass over the hinges for a better hold.
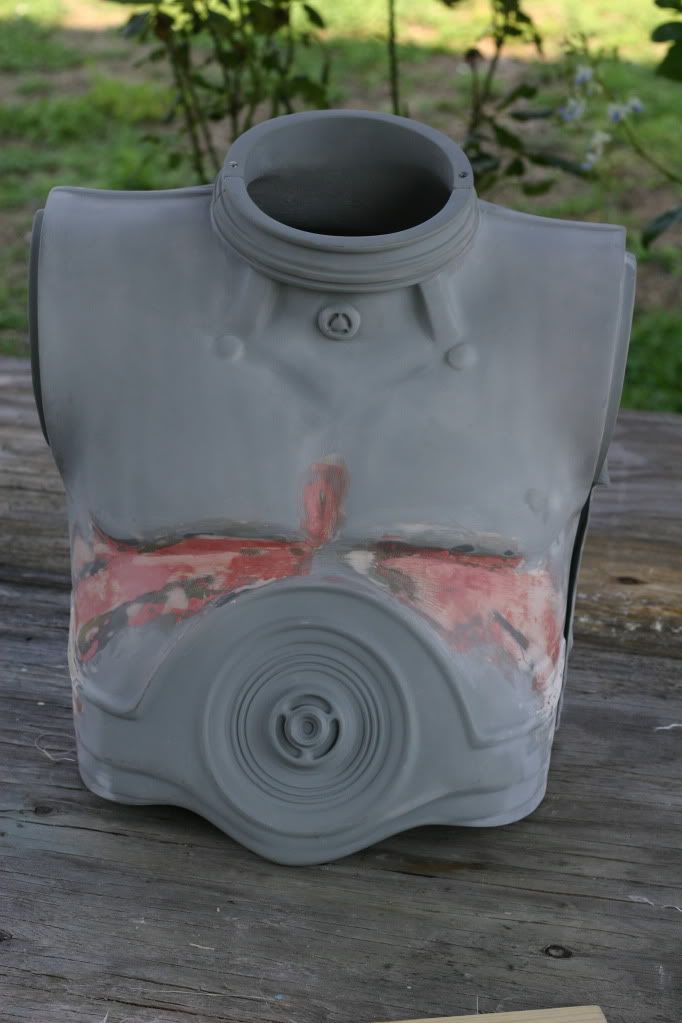
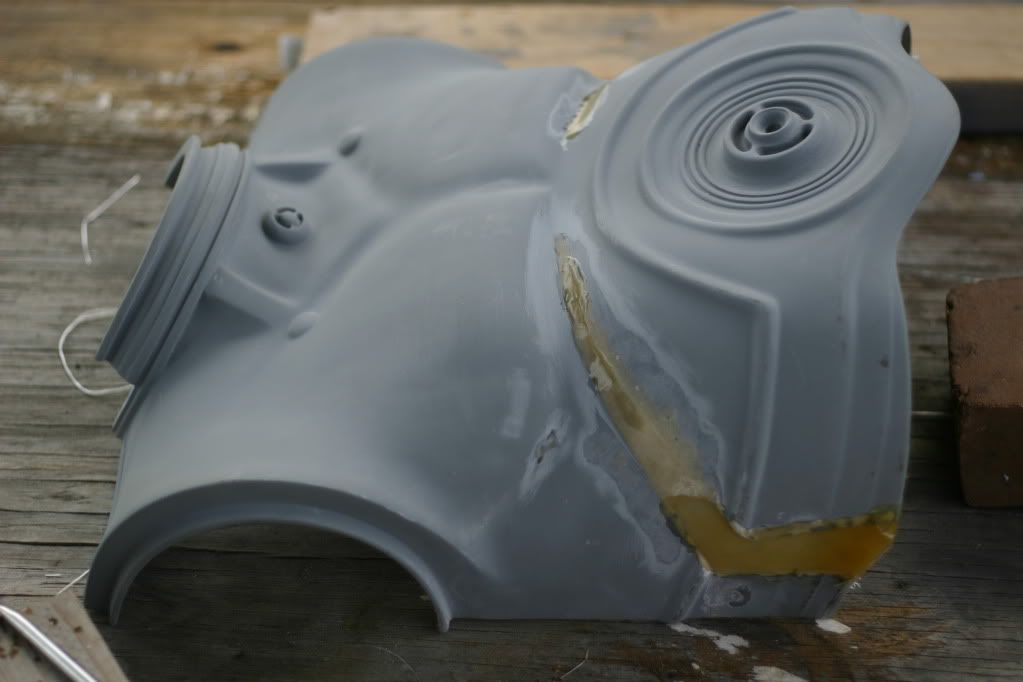
We had an armor party at my house and it gave me an opportunity to get helped into the chest and a few other parts. The chest was pretty tight on me so I made two cuts in the front of the chest to open it up. 2 inches was what I wanted but made the it look like a beer belly so I went with 1 1/2 inches. I fiber glassed the inside, fill the top with resin and now all I have to do is fiberglass the front and sand and fill.
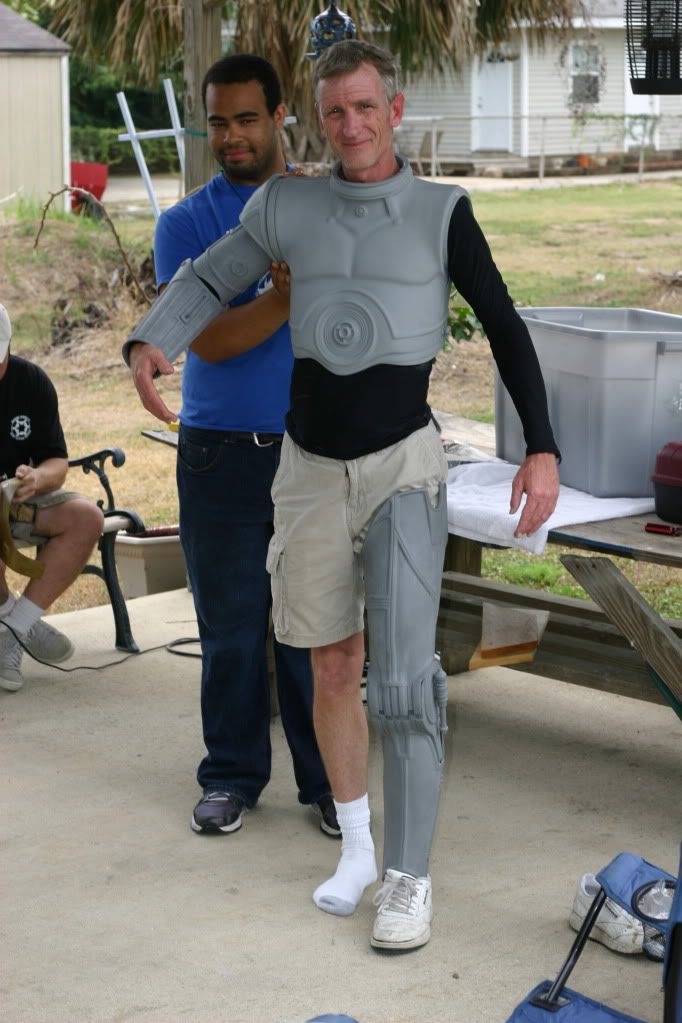

At first I went with 2 inches but decided to go with 1 1/2 inches.
MORE TO COME
Last edited by waldo kent, 11/8/2011, 3:16 pm
---
Jeffrey Kent
TK 5738
Facebook
SKYPE Me: jeff.kent63
|
|
6/26/2011, 2:58 pm
|
Link to this post
Send Email to waldo kent
Send PM to waldo kent
Blog
|
GRINCH72
Registered user
Registered: 11-2010
Location: Palm Harbor, FL
Posts: 64
Karma: 0 (+0/-0)
|
|
Reply | Quote
|
|
Re: Waldo's Build
Jeffrey thanks for the pics! That is why I love IKEA  Can you tell me do you have the larger arms from Chris? How do you like them? May I ask what is your arm size? Also did you purchase the 39" or 41" Torso? Can you tell me do you have the larger arms from Chris? How do you like them? May I ask what is your arm size? Also did you purchase the 39" or 41" Torso?
-Brad
---
"Do whatever you want in life. Just don't do it to a chicken...I eat chicken."
|
|
6/26/2011, 6:48 pm
|
Link to this post
Send Email to GRINCH72
Send PM to GRINCH72
Blog
|
matthew007
Registered user
Registered: 01-2010
Posts: 521
Karma: 5 (+5/-0)
|
|
Reply | Quote
|
|
Re: Waldo's Build
I got the bigger size arms and bigger size chest both seem ok.only issue I have is the shorts and top of the legs.
|
|
6/26/2011, 7:16 pm
|
Link to this post
Send Email to matthew007
Send PM to matthew007
|
GRINCH72
Registered user
Registered: 11-2010
Location: Palm Harbor, FL
Posts: 64
Karma: 0 (+0/-0)
|
|
Reply | Quote
|
|
Re: Waldo's Build
What issue do you have with legs & shorts? Are they the ABS moncal shorts?
---
"Do whatever you want in life. Just don't do it to a chicken...I eat chicken."
|
|
6/26/2011, 7:58 pm
|
Link to this post
Send Email to GRINCH72
Send PM to GRINCH72
Blog
|
waldo kent
Registered user
Registered: 08-2010
Posts: 178
Karma: 1 (+2/-1)
|
|
Reply | Quote
|
|
Re: Waldo's Build
quote:
GRINCH72 wrote:
Jeffrey thanks for the pics! That is why I love IKEA Can you tell me do you have the larger arms from Chris? How do you like them? May I ask what is your arm size? Also did you purchase the 39" or 41" Torso?
-Brad
I purchased the chest from another member who told me it was a large tk409 chest. My chest size is about 35, but it was very tight and I could barely breathe. I have the large tk409 arms and I sent you the measurements last night. For me they are a little big. The length is good, I just have skinny arms. I ordered Moncal shorts and and one of his heads. Also managed to get on the metal eye run that still had not been to the machinist. hopefully in the next month I'll get them in.
I also heated up the back and pulled it out just a tiny bit which seemed to help. I used a heat gun instead of an oven because I wanted to take no chances in warping any other part of the chest. Using a heat gun concentrated the heat only where you it. Use gloves and get needsomeone to help you. I usually move the gun back and forth quickly until the area begins to move. Hold it in place and use a spray bottle to cool it down quickly.
Last edited by waldo kent, 6/27/2011, 12:20 am
---
Jeffrey Kent
TK 5738
Facebook
SKYPE Me: jeff.kent63
|
|
6/26/2011, 11:49 pm
|
Link to this post
Send Email to waldo kent
Send PM to waldo kent
Blog
|
GRINCH72
Registered user
Registered: 11-2010
Location: Palm Harbor, FL
Posts: 64
Karma: 0 (+0/-0)
|
|
Reply | Quote
|
|
Re: Waldo's Build
Moncal also sell's a 3po head? Is this the one that Chris uses? Do you know what head size will fit?
---
"Do whatever you want in life. Just don't do it to a chicken...I eat chicken."
|
|
6/27/2011, 7:42 am
|
Link to this post
Send Email to GRINCH72
Send PM to GRINCH72
Blog
|
waldo kent
Registered user
Registered: 08-2010
Posts: 178
Karma: 1 (+2/-1)
|
|
Reply | Quote
|
|
Re: Waldo's Build
I didn't believe a TK409 fiberglass helmet would fit me at 23 inches so I'm trying the moncal vacuform helmet. I'll post pictures when I get it.
---
Jeffrey Kent
TK 5738
Facebook
SKYPE Me: jeff.kent63
|
|
6/27/2011, 12:14 pm
|
Link to this post
Send Email to waldo kent
Send PM to waldo kent
Blog
|
matthew007
Registered user
Registered: 01-2010
Posts: 521
Karma: 5 (+5/-0)
|
|
Reply | Quote
|
|
Re: Waldo's Build
Good choice,I've seen other people on here saying the same thing regarding the fiberglass head,this head cost a lot of money for something that dosent fit.the fiberglass head is fanstatic,I'm going to sell myn or have it on show.
|
|
6/27/2011, 1:55 pm
|
Link to this post
Send Email to matthew007
Send PM to matthew007
|
GRINCH72
Registered user
Registered: 11-2010
Location: Palm Harbor, FL
Posts: 64
Karma: 0 (+0/-0)
|
|
Reply | Quote
|
|
Re: Waldo's Build
quote:
waldo kent wrote:
I have the large tk409 arms and I sent you the measurements last night. For me they are a little big. The length is good, I just have skinny arms.
I'm going to purchase the small TK409 arms. If they are too small on me I will be more than happy to swap the arms with you.
---
"Do whatever you want in life. Just don't do it to a chicken...I eat chicken."
|
|
6/30/2011, 7:00 am
|
Link to this post
Send Email to GRINCH72
Send PM to GRINCH72
Blog
|